I felt it would be fitting to mark Easter with a colourful, floral photograph. What you see here is a collection of five different pictures. Merging photographs this way was straightforward, although it did take a bit of time.
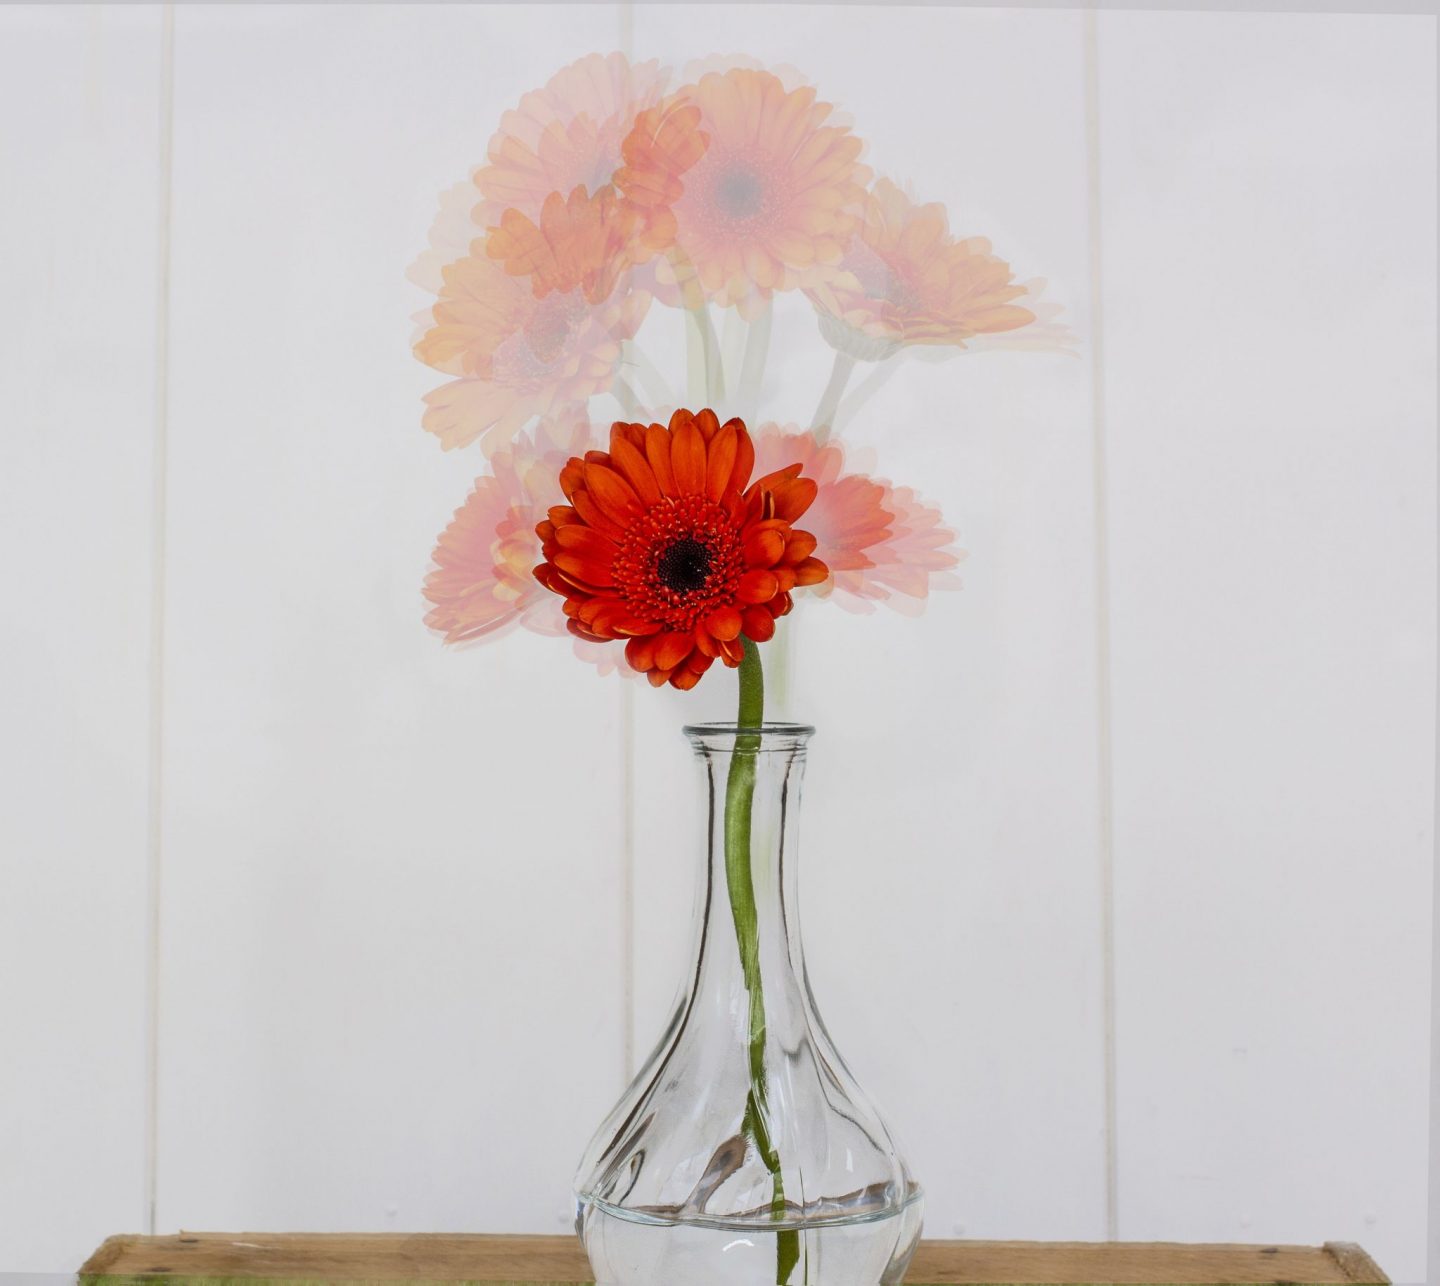
What you see here is four images of the same bouquet of Gerbera Jamesonii flowers. I then took a single image of one flower all on its own. I combined all of the images, but ensured the single flower was given more prominence so the image had a focal point.
I hope you like the result. Please do leave a comment below if you do. For those interested in the detail, here are instructions so you can have a go yourself.
How to attempt this yourself
So long as you use good photo editing software or a good editing app, merging photographs like this is easy. Here’s how to do it.
- Take several different images of the same flowers using a tripod mounted camera. Apart from the flowers themselves, everything else must stay static: Camera, vase, background, all of it must stay in exactly the same position.
- I use Photoshop to edit my images. Whatever photo editor you use, open each picture individually and edit as you wish (but do not crop the images at this stage).
- Take one of your edited images and copy it, drag it and place it exactly over the top of another image.
- Open the eraser tool and set the opacity to around 40%. Drag the eraser over the whole of the image, making sure not to miss anything. The ‘bottom’ image should slowly become visible through the ‘top’ image.
- Repeat step three and four. Play with the opacity settings if you wish. As a guide, the opacity was set to 100% when I used the eraser to highlight the single flower in the centre of the pic. That’s why it’s so much brighter than all the others.
- When you are happy with the result, you can then crop and save the image.
If you have a go at this yourself, do let me know. I’d be interested to see how you get on. May I also wish you a very happy Easter.


2 thoughts on “Combining multiple photographs using Photoshop”
Oh wow, that’s clever. I like it! Thanks for the ‘how to’ as well.
It’s a very simple effect tara. It does, however, require a little time. Glad you liked the ‘how to.’ If you give it a go, let me know.